Installation
- Visit SBOM Workbench releases
- Download the installer for your platform:
- macOS:
.dmgfile - Windows:
.exeinstaller - Linux:
.AppImageor.debpackage
- macOS:
- Run the installer
Getting Started
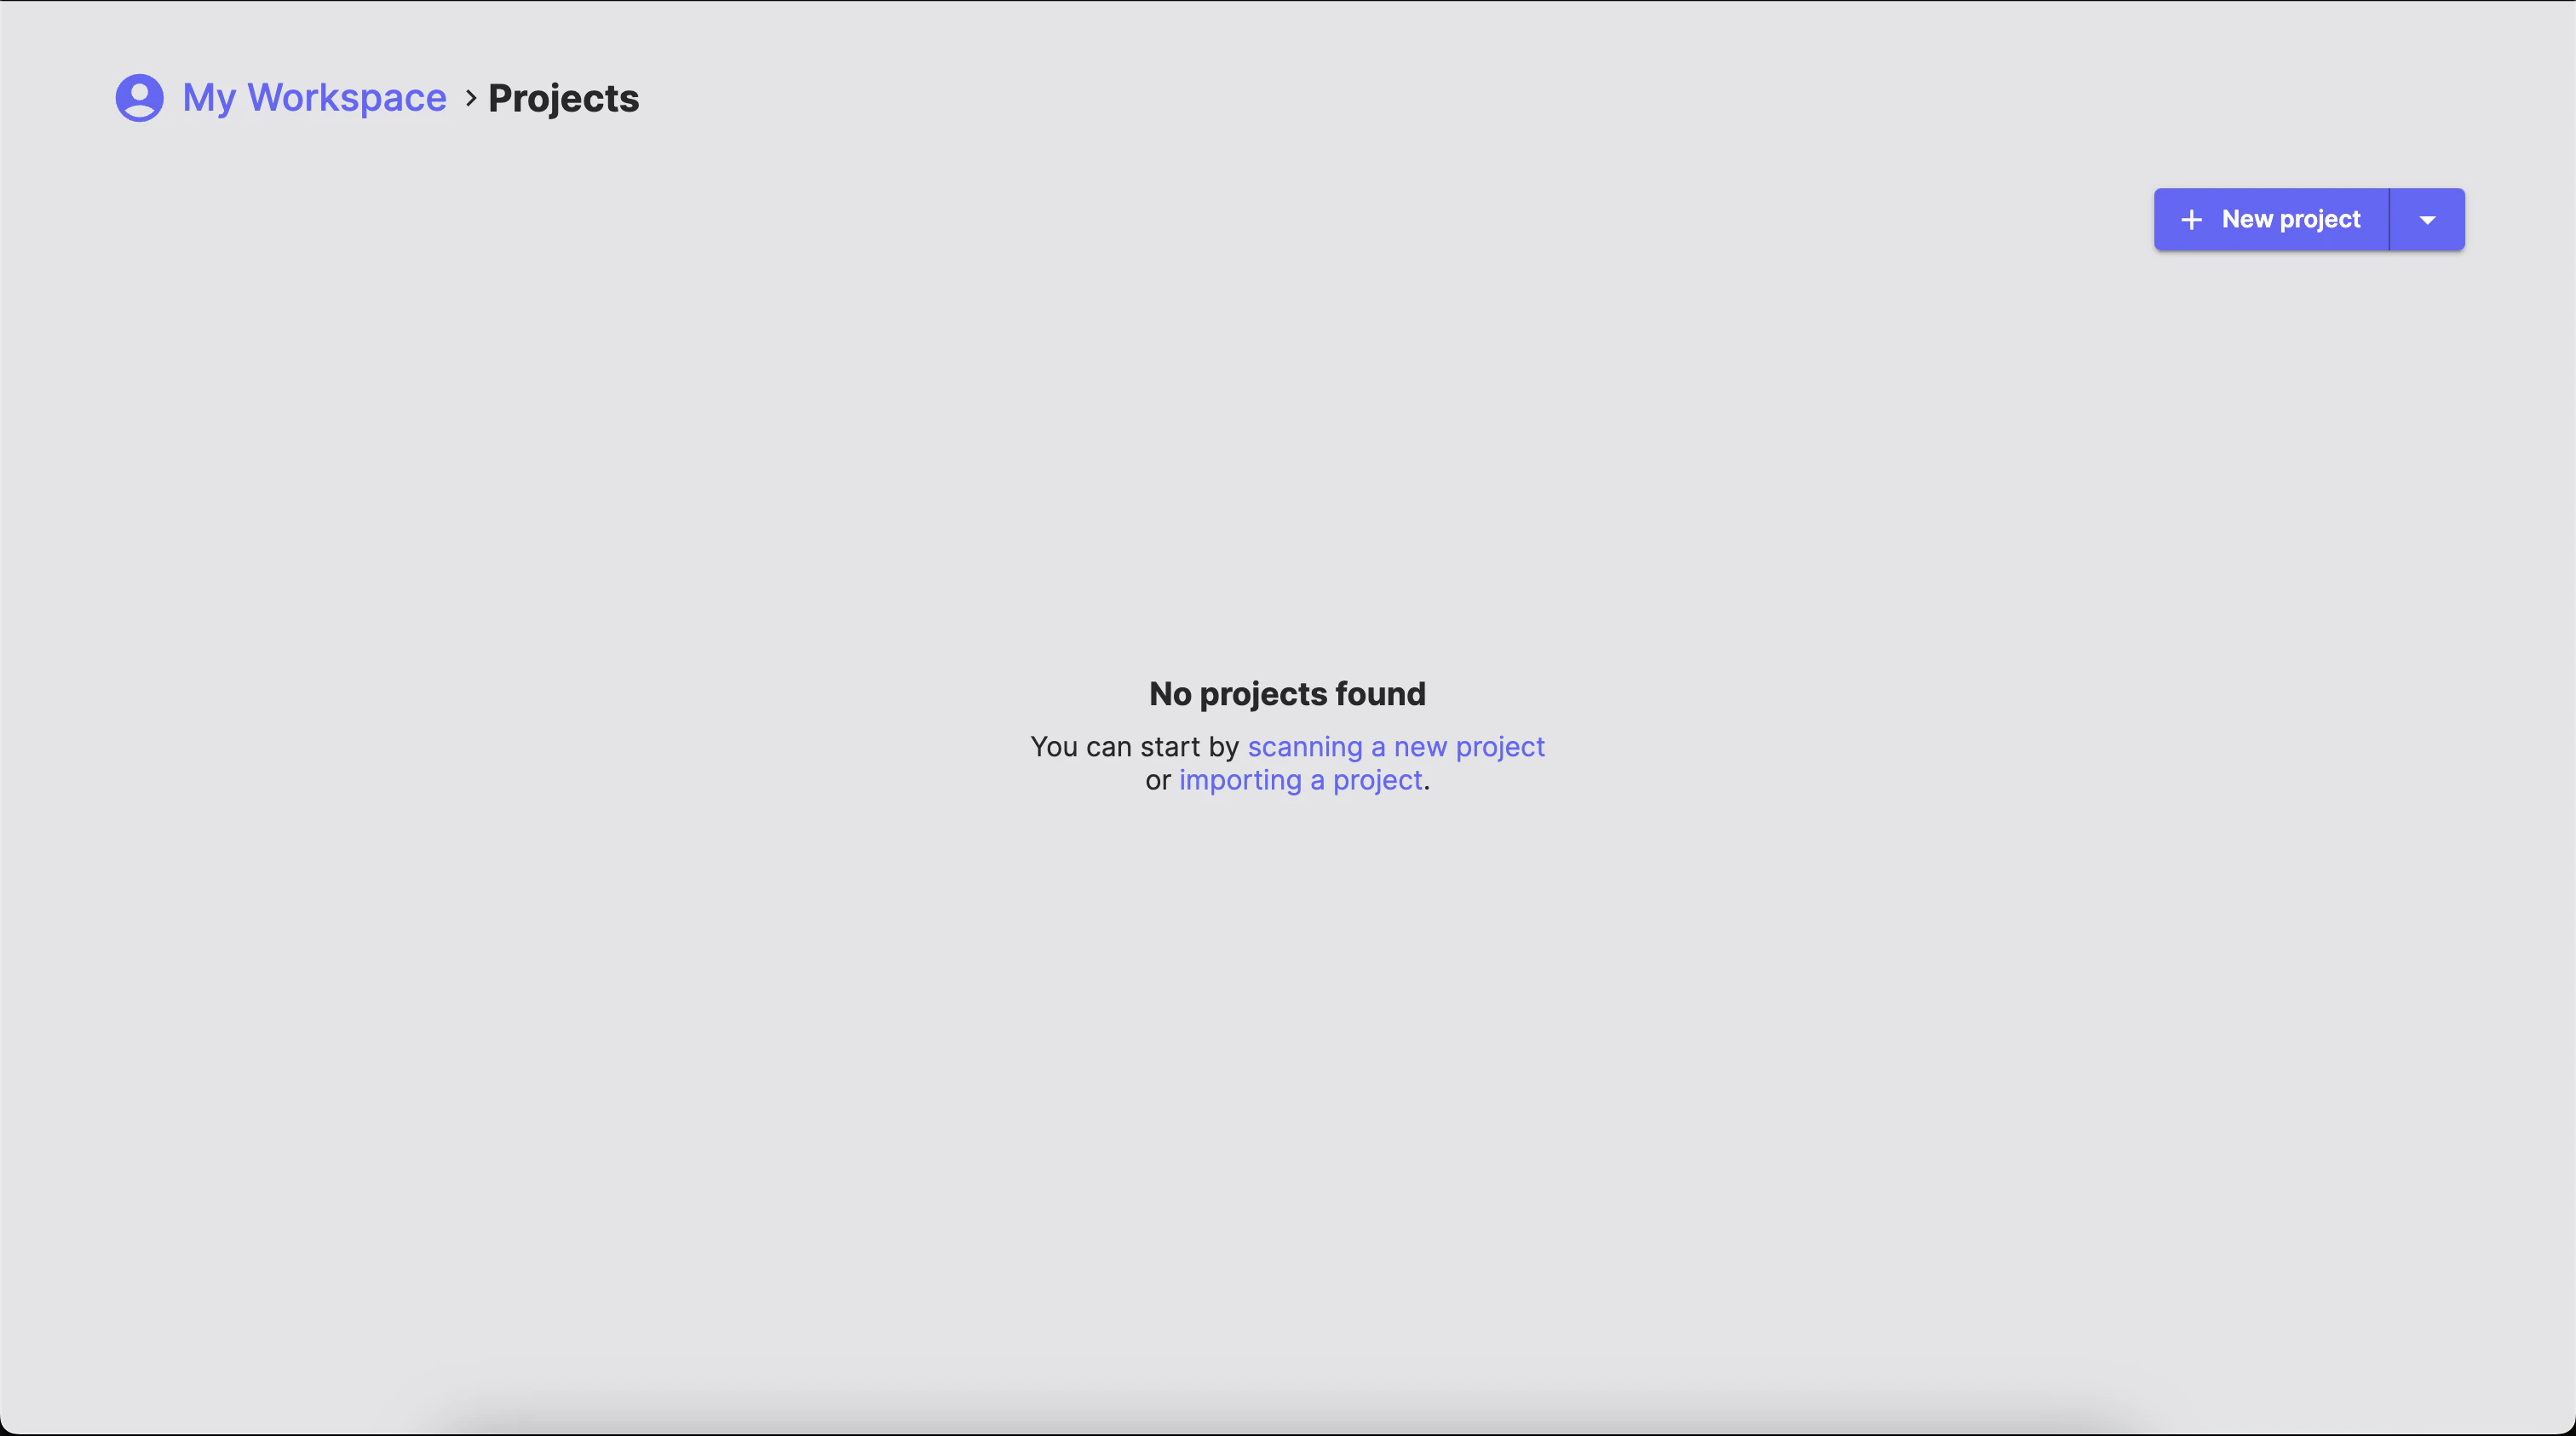
Add or Import Your Project
In theHome tab, click the New project to add a new project from the source code itself, or click on the arrow to display te dropdown menu to add a new project from a WFP file or import an existing project in the state it was exported.
Project settings screen.
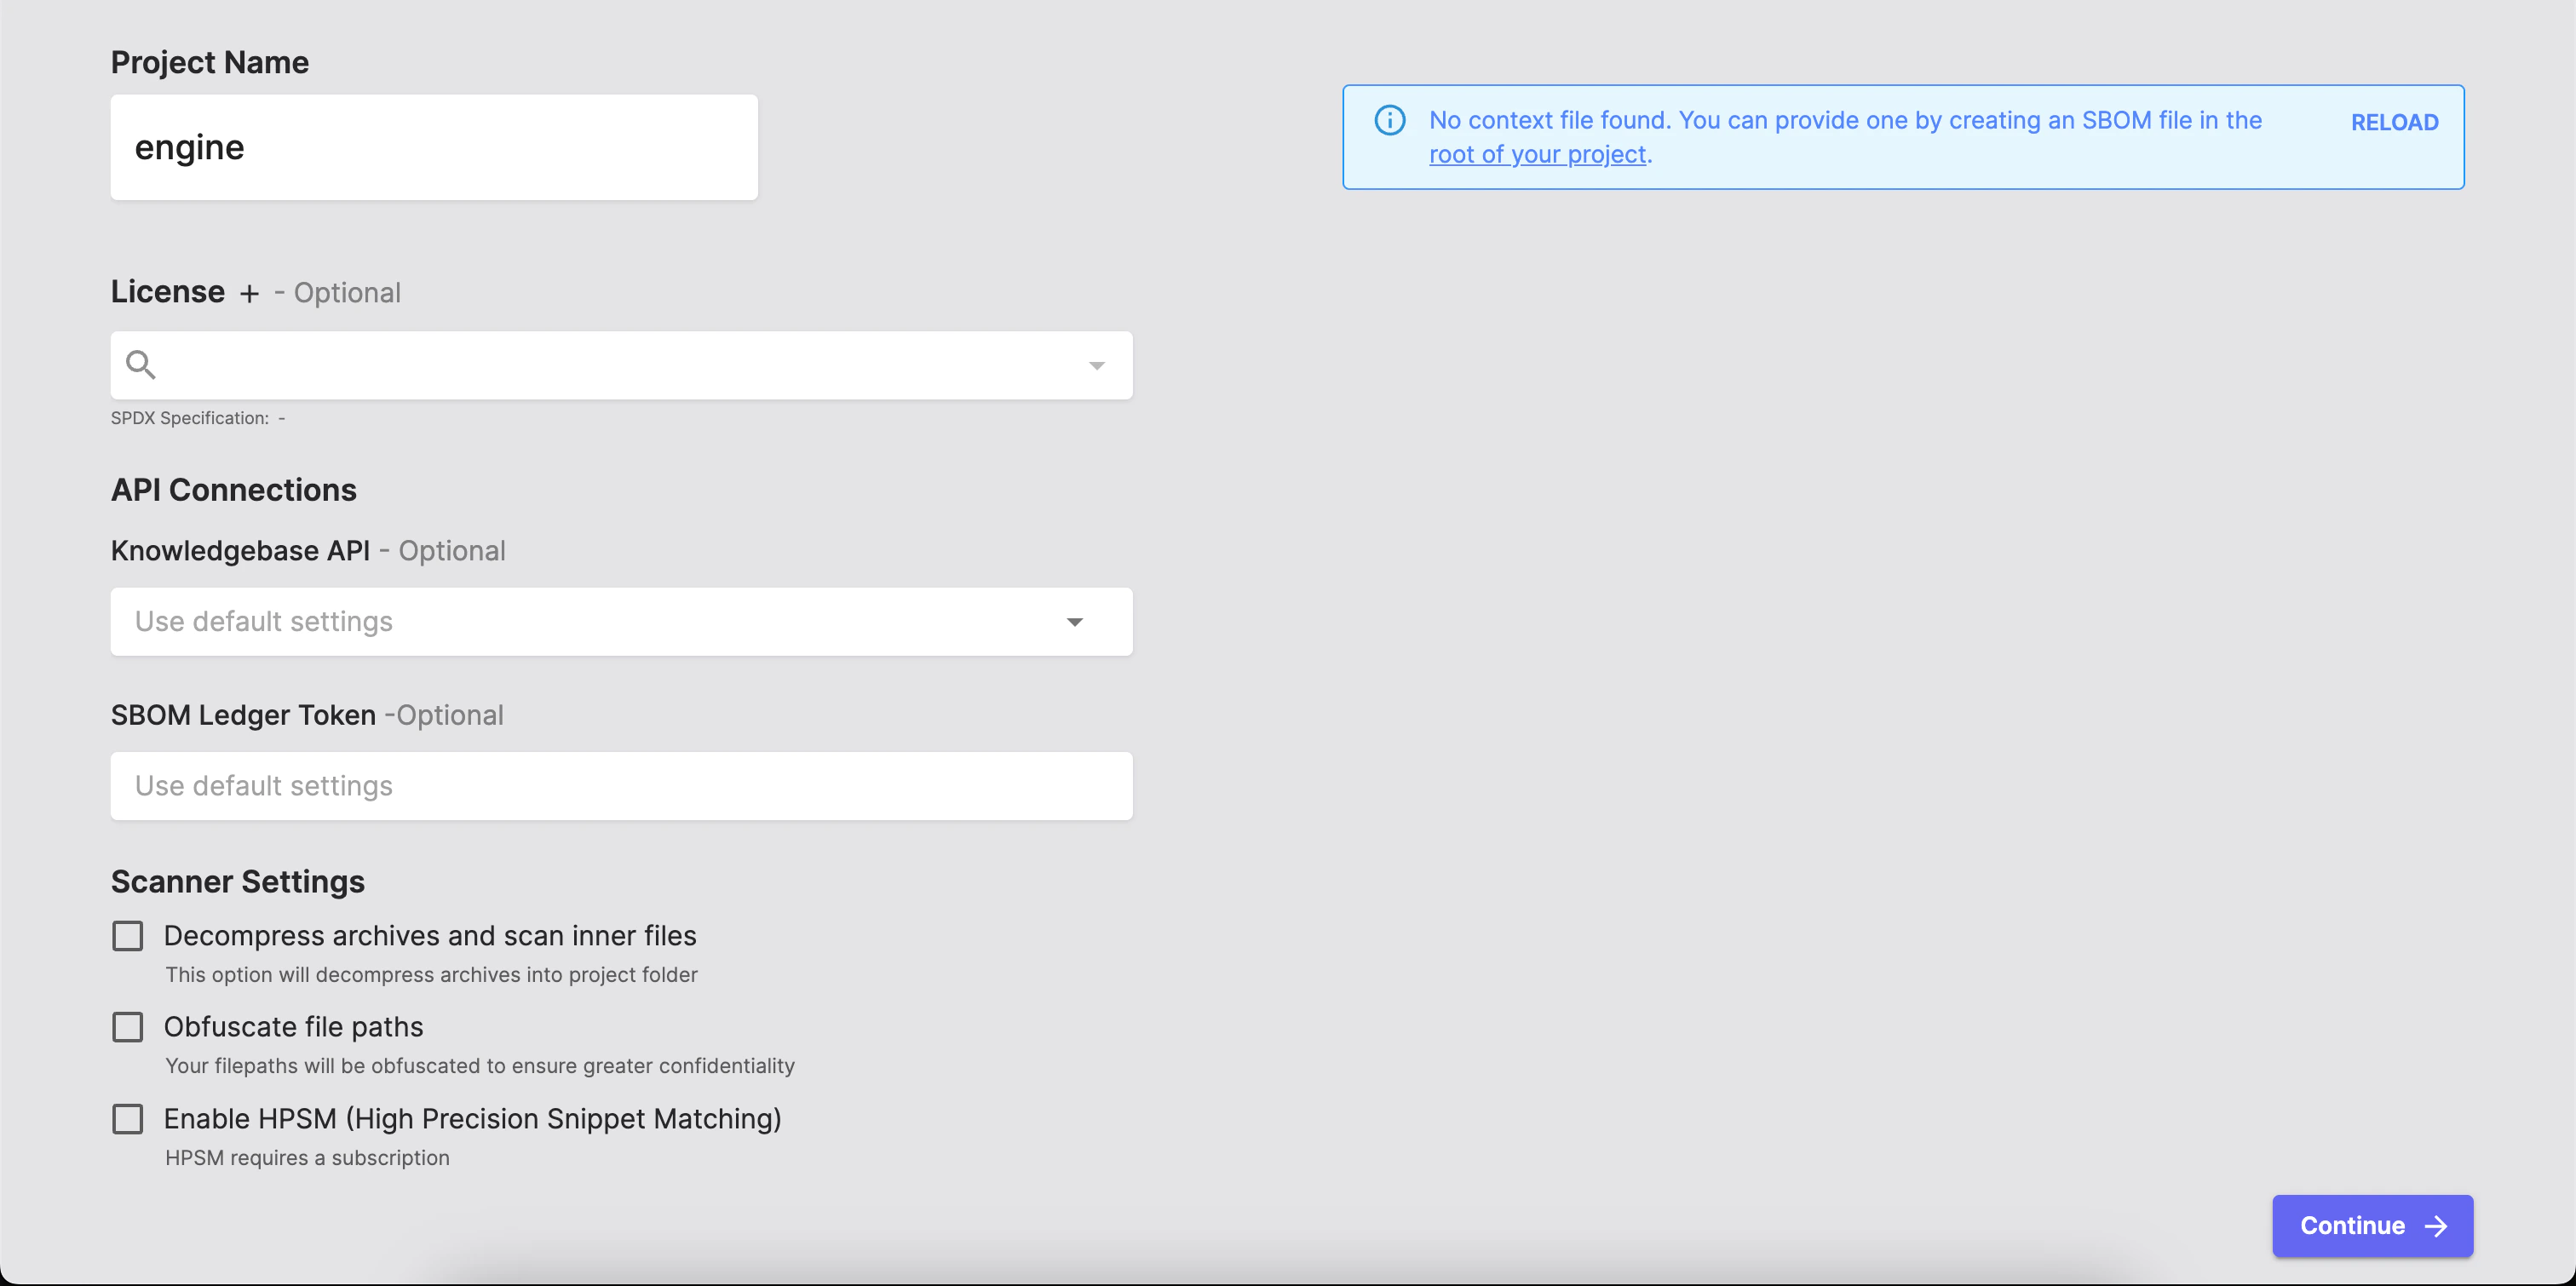
- Project name
- License
- API connections
- Scanner settings
You can provide a context file scanoss.json declaring known components to get the most accurate results.
After you add and configure your project settings, the SBOM Workbench will automatically go through various stages: scanning your project, detecting licenses, analysing for dependencies, searching for vulnerabilties and so on.
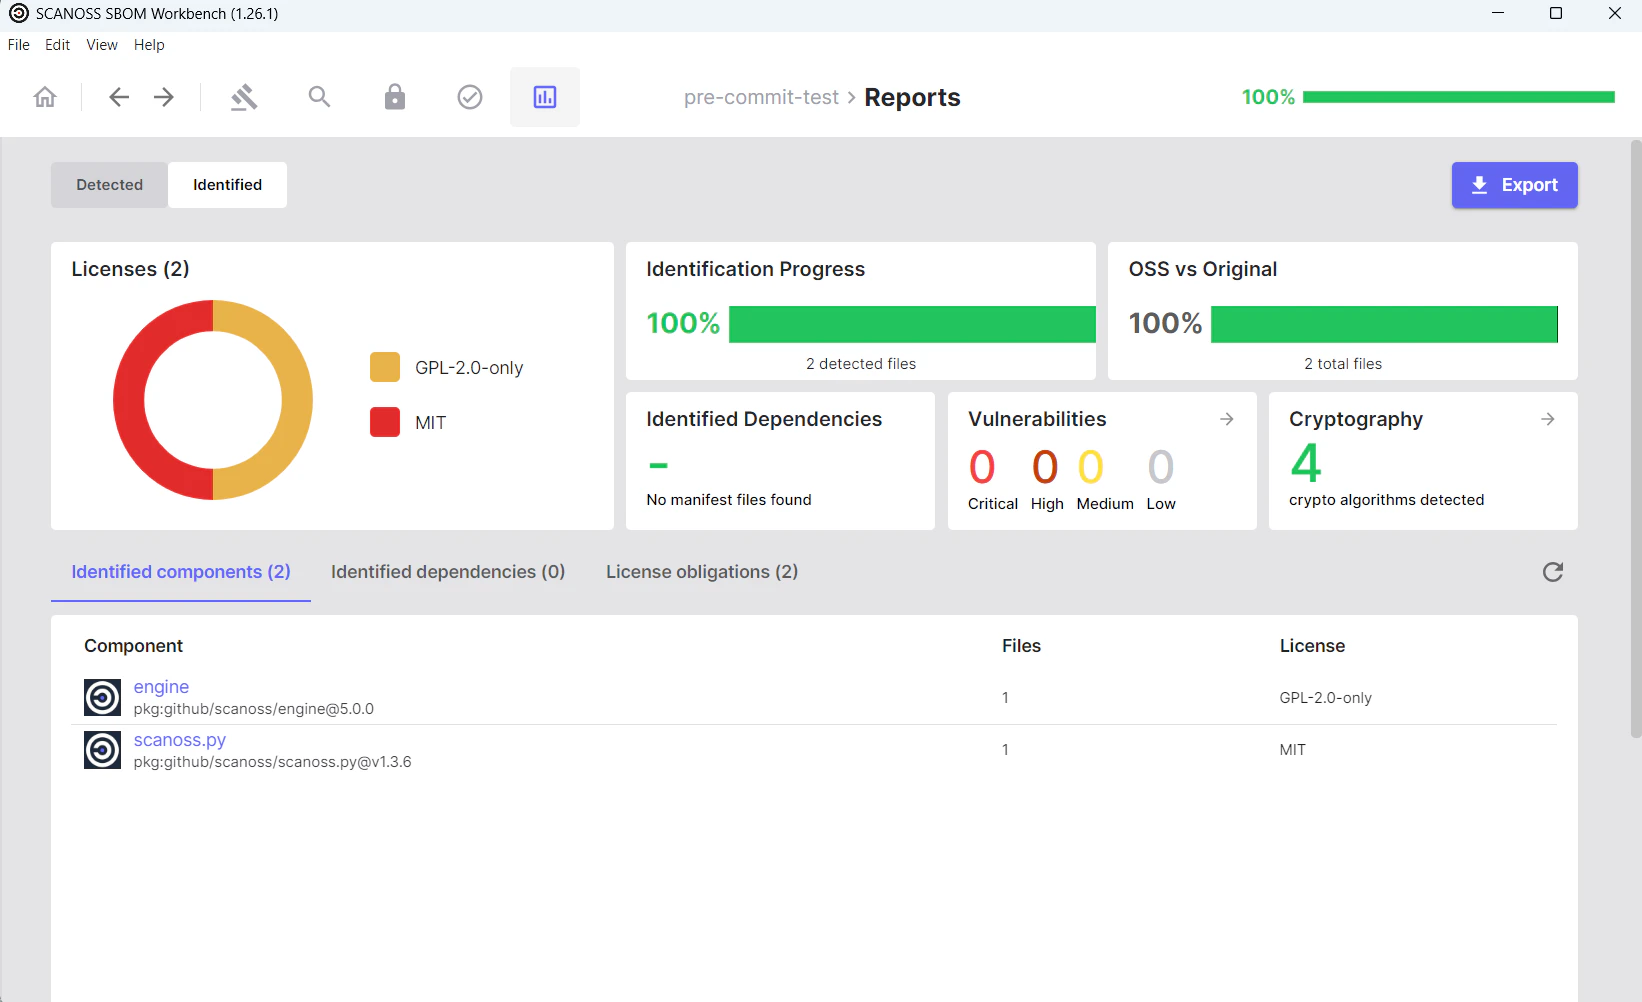
Reports Dashboard
After you add and scan your project, the results will appear in theReports tab.
The Reports tab provides an overview of detected components, licenses, dependencies, and vulnerabilities identified.
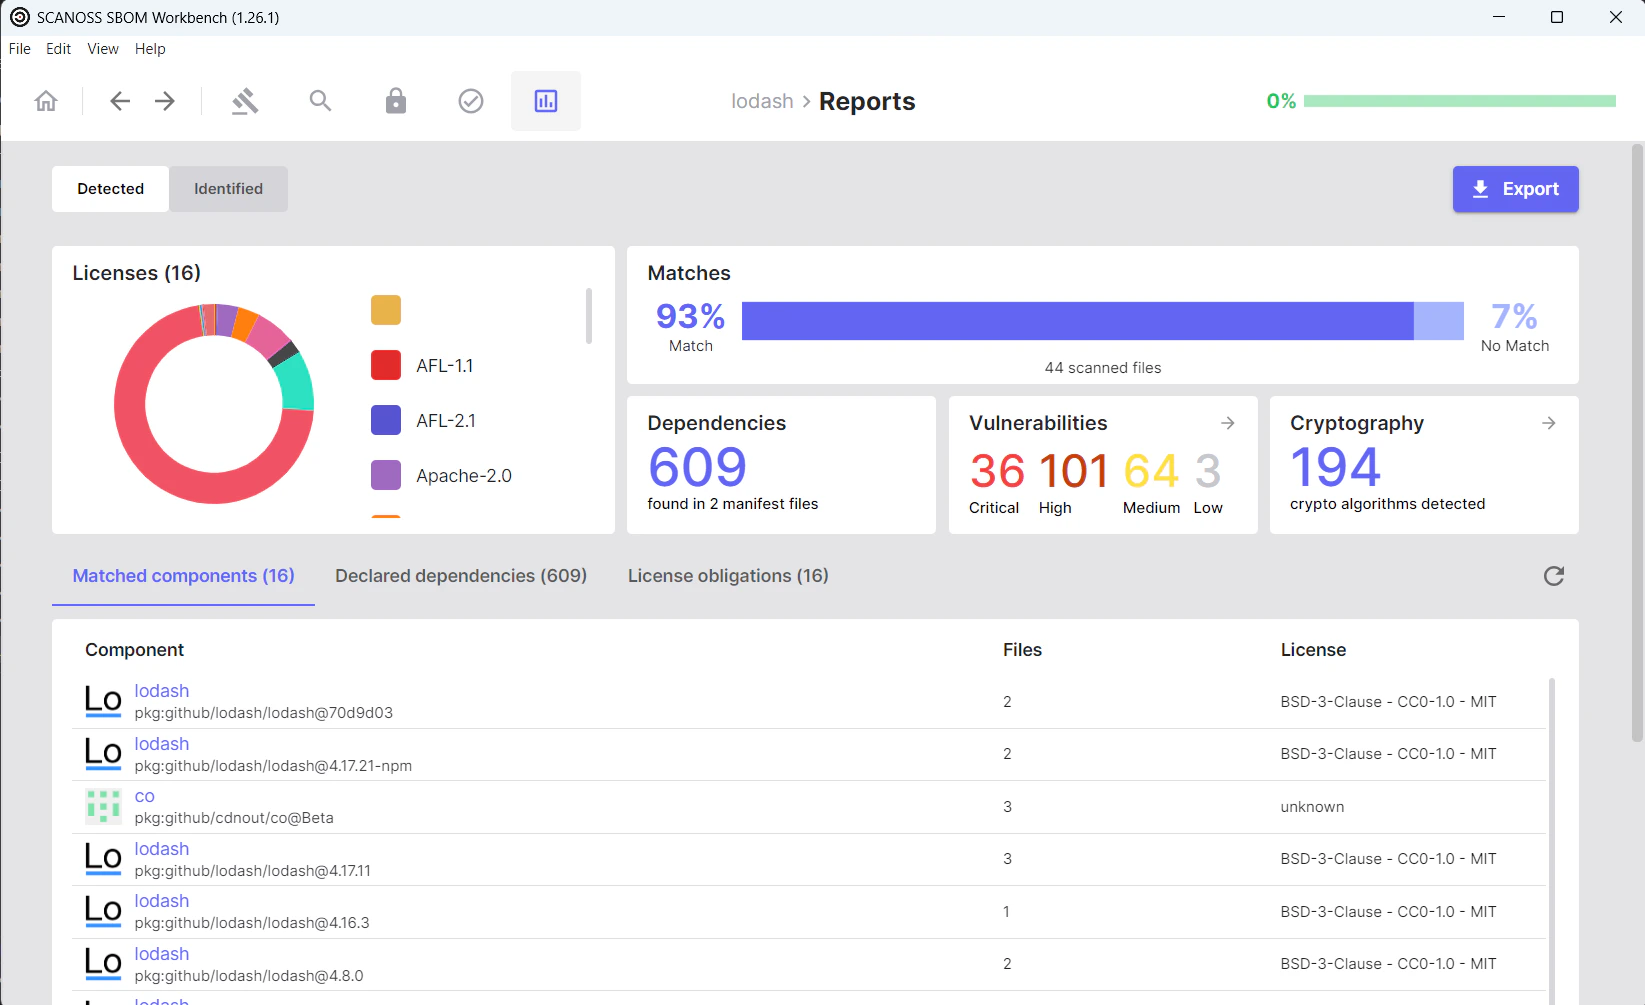
Detected Vulnerabilities
Clicking onVulnerabilities displays detected security vulnerabilities (CVEs) for each component.

Detected Components
For this step, navigate to theDetected Components tab.
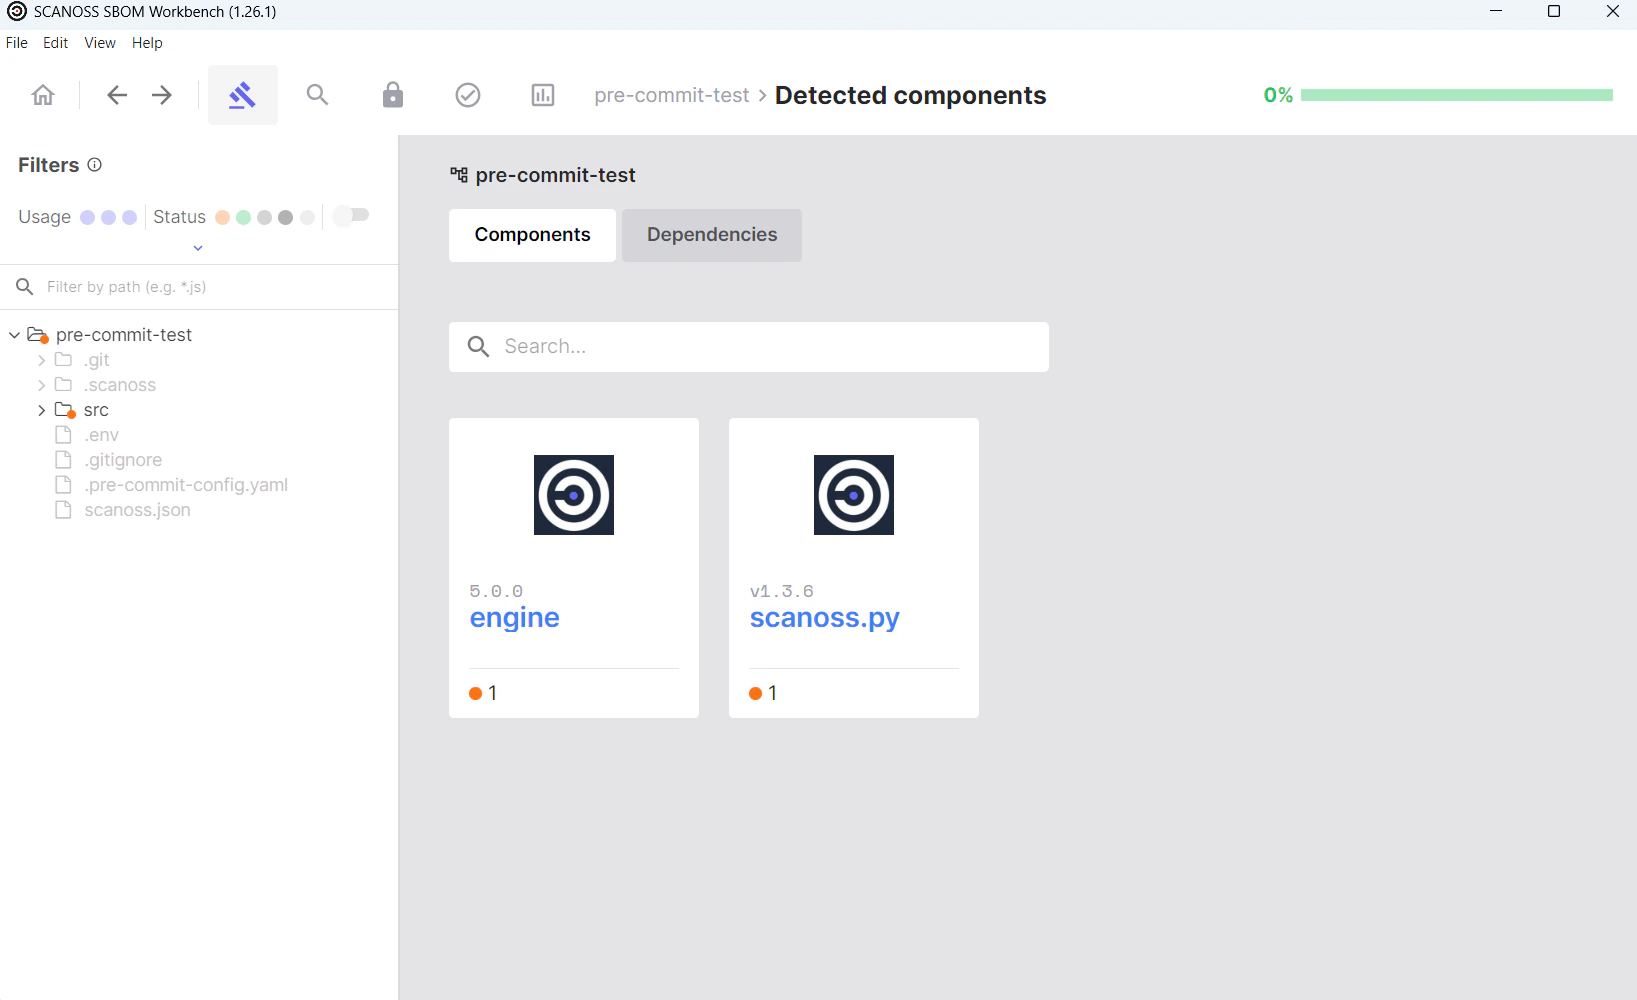
You can mark components as Original, but there is no option to ignore components, as this would conflict with the principles of an SBOM.After finishing the identification process, you can review it in the
Identified components tab.
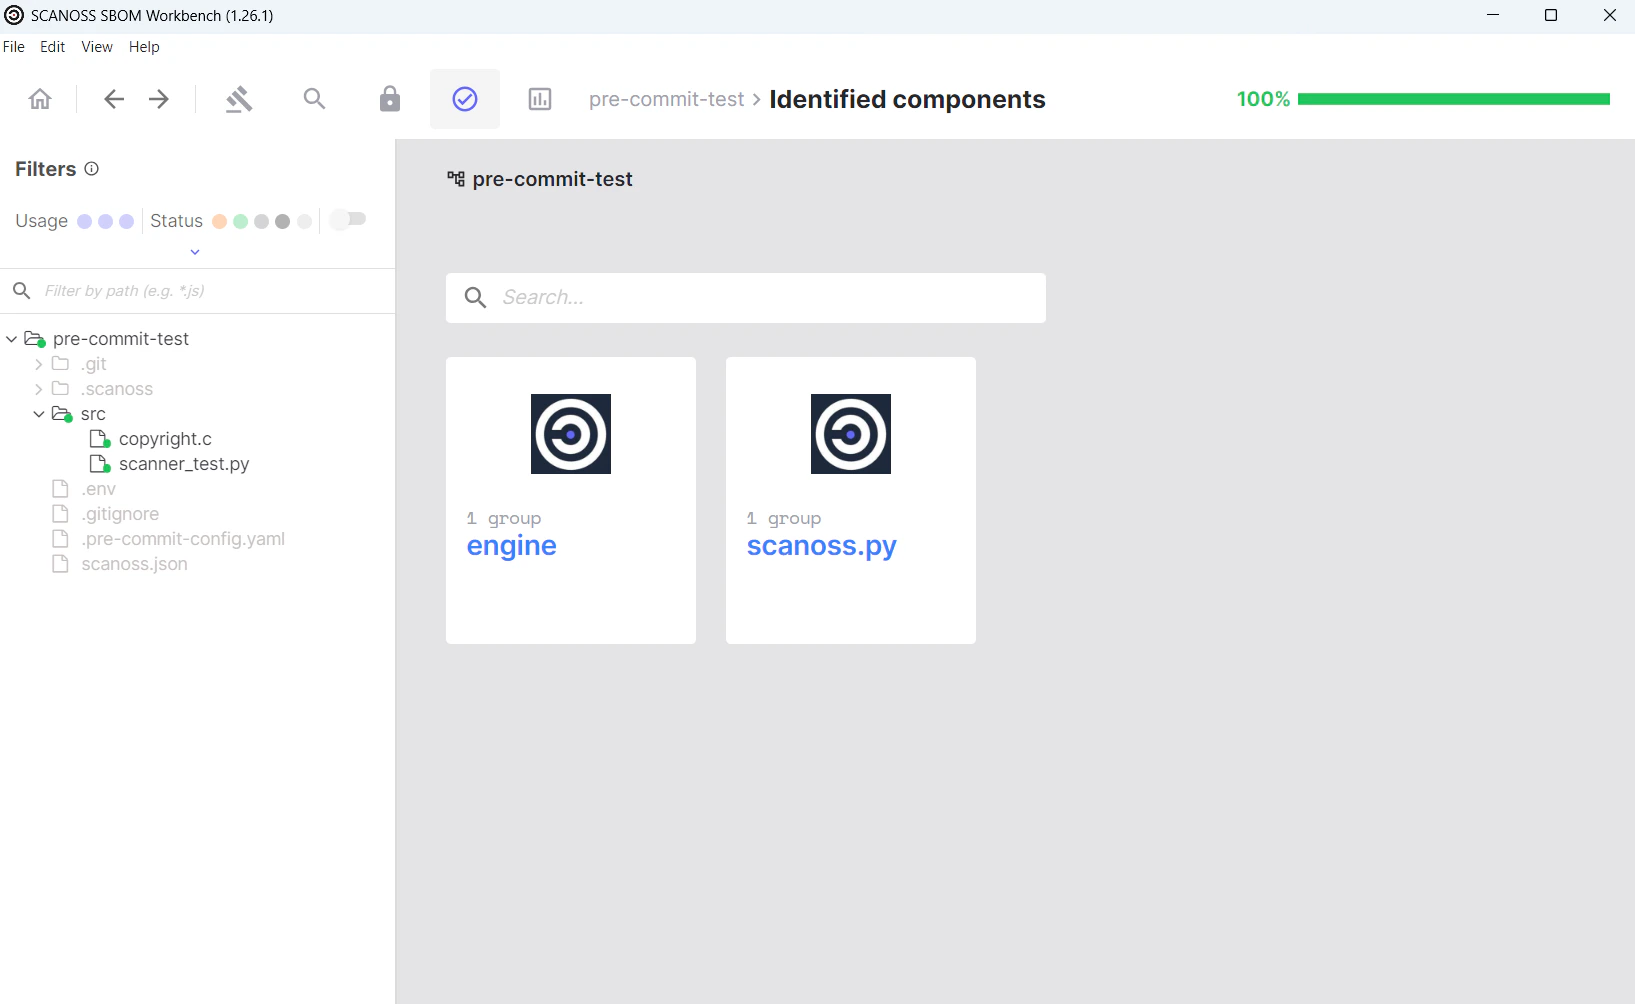
Identified Components
Go to theIdentified view in the Reports tab for a final project review (compare it with the Detected view if needed), then click Export to select your SBOM format.